Category Archives: Technology
Home security – installing a new system with alarm.com (Part 1)
Back in 2007 I wanted to get a home security system that was more than just the standard type of system. I stumbled upon a do it yourself system from a company who at the time was called InGrid, later renamed to LifeShield. It had everything I wanted – keyfobs, mobile app for my phone, nice web interface, modular and redundant, etc. I had that system until yesterday (July 10th, 2013).
I wasn’t actively looking to replace my home security system, but after talking with a friend who happens to work for alarm.com, I was convinced that it was time for an upgrade. Several of the components on the old system were starting to wear out and fail and I was growing tired of clearing problems at the panel.
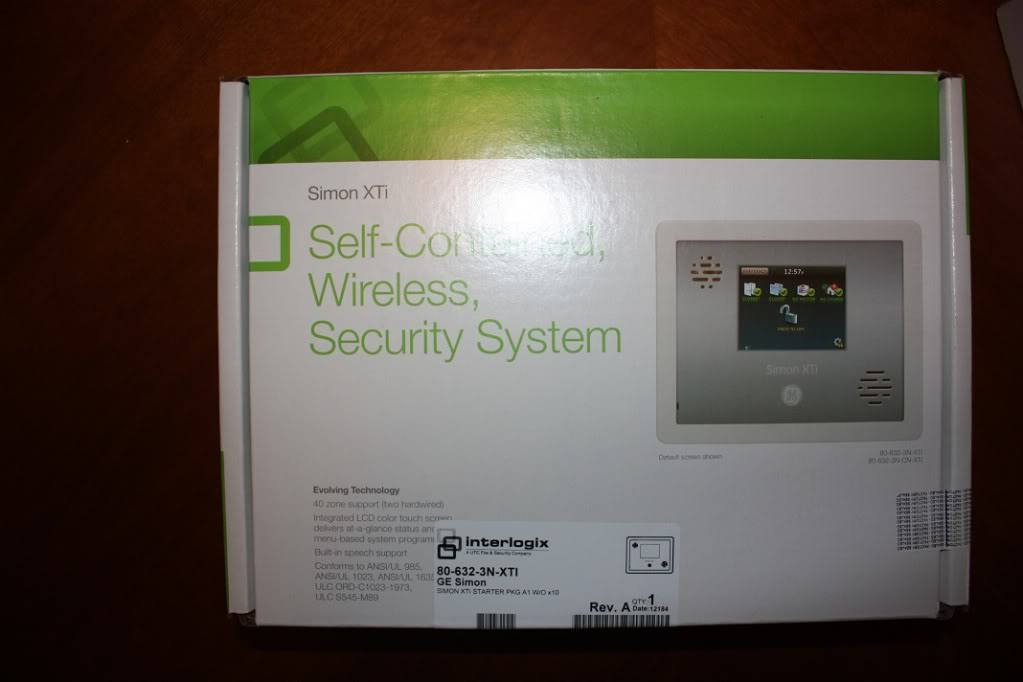
Hello GE Simon XTi by Interlogix and powered by alarm.com through SafeMart!

When I received the GE Simon XTi system it came with 3 door/window sensors (the large model), one keyfob, one motion sensor and one CDMA cellular module. This wasn’t enough to cover all the entry points into my home, so I ordered a few more components through eBay. I also decided to pull out the CDMA cellular module since quite honestly CDMA has terrible coverage in my particular area. What I ended up getting is a GSM cellular module with service through at&t which does have excellent coverage especially since I live less than half a mile from one of their towers.
Most of the parts arrived yesterday and once I was home from work – I began the install and setup process. This blog post will cover the setup and installation of the basic home security system and its components. The second part which I will post later on – will cover my experience setting up zwave devices for home automation and control.
So let’s get to it, first off – the GE Simon system came in a very nicely designed box with all the components packed neatly and safely inside. Packaging sometimes gets overlooked but it’s actually very important for a number of reasons such as safety, marketing, protection from damage during shipping, etc.
The next step was to unbox everything and begin setting up the control panel and connecting the wireless sensors to the system.
Before I could do that I had to set up the panel and get it ready to power on. This entails installing the battery pack, which is simple and nothing special. The system does not come with a standard power cord, you have an AC power pack which you then manually connect the power cable to the leads on the AC pack, then manually connect the other end of the power cable to the leads on the back of the panel. Since its AC power there is no polarity so it doesn’t matter which wire goes where on the panel. Each input connection is labeled “AC Input”.
I also installed the cellular module into the optional bay on the back of the Simon XTi. It simply snaps into place and you can secure it with a screw which is provided in the box. It comes with an onboard antenna but you also get an external antenna extension. I want the best possible signal on my system so I installed the external antenna wire. You just snap it onto the antenna connector located on the cellular module and run it out of the open slots on the back of the panel casing. While doing that I also connected my phone line (although not necessary at all). I noticed the panel also has an ethernet port, but I didn’t bother with that either.

Each standard sensor comes in a white box labeled with the GE part numbers and other information. I wanted to approach this install as someone who had no idea what to do or how to proceed. I was somewhat disappointed that the instructions for each sensor did not mention anything about the specifics of adding the sensor to the XTi panel.

You get a little bit of instruction on how to put the system into learning mode but that’s about it. It would be nice if the manufacturer included information about the sensor, such as which sensor group to add it to, product codes, etc. I was genuinely confused at first when adding sensors since the XTi panel asks you for an optional product code, which you cannot find anywhere on the sensor or its documentation.
A bit of advice: be ready to add sensors and remove them only to re-add later. When setting up my system I actually worked on it over the course of two days and I wasn’t ready for activation right away. I had time to tinker with the sensors and ended up removing and re-adding them perhaps 3 times before I was finally satisfied with the configuration. Part of what I didn’t realize at first is that you can edit the sensor name on the panel when you add each sensor, and also add extra descriptions that get appended to the main description. The default for many of the sensors is “Front Door”. Obviously you should change that to something more descriptive.
The keyfobs for example, were the easiest to program into the system because you simply hold the arm/disarm buttons down at the same time to pair it with the panel, but I had 3 of them and had to do a little internet research to find out what group I should put them in and how to name them so I could show who armed/disarmed the system (since 3 different people will now have a keyfob).
What I did was to pair each Keyfob and let the primary description be “keyfob”. Under that I added another description line with just one letter, the first initial of each person’s name who would own one of these keyfobs. So mine for Example was named “keyfob” then under that, the letter “J”. From there you can login to the Alarm.com web interface and rename the sensor with a more usable or familiar name for the person who will use it. These friendly names are what you see in alerts on the website and on the mobile app as well as in email notifications. It would be nice if the panel let you type in your own description, but instead you have to select from a predefined list of labels.
One minor gripe about the keyfobs. On the old system the keyfobs had a separate button for arming in stay or away modes, but the new keyfobs with the GE system have one arm button and the number of times you press the arm button determines how the system is armed. This will take some getting used to and seems less than ideal to me. But with limited space on the keyfob I can understand this design. One press to arm in stay mode, two consecutive presses to arm in away mode.

Next I installed the motion sensor and smoke detector. These were very straightforward and also easy to program. I did have a few minutes of confusion over the smoke detector however, after I paired it with the panel I started getting error messages complaining about the serial number already existing. It turned out that the system was still in learn mode after I had paired the sensor with the panel, but I was still tinkering with the smoke detector which triggered the pairing process again.
Another Tip: when pairing the smoke detector, close out of the learning mode on the panel so that you don’t end up getting confused and troubleshooting a problem that doesn’t exist. I also had to determine the proper group for adding the smoke detector. I don’t recall seeing any documentation with the system that gives you a table of which groups are for which types of sensor. I had to find this information on a YouTube video that SafeMart provided. It would be nice if this information were either included with the system or included on the documentation that comes with each sensor.
My only gripe about the motion sensor is that it is not labeled up or down to help you determine which way to mount it. I have not yet invested the time to research this yet, so it’s very possible that I have mine incorrectly mounted.
I am using 3 of the larger crystal door sensors, but I also ordered and received several of the micro door/window sensors. I highly recommend the micro sensors over the larger ones. The smaller sensors comes with self-adhesive pads making them easier to install in some spots, but the larger sensors do not come with any adhesive pads at all, and seem to be intended for screw mounts. I had to get creative in how I mounted several of my sensors. A minor gripe about the door/window sensors, both have to be pried open to pair them with the panel. This is something I needed a small screw driver for, it’s just a one time thing and not a big deal, but it does make initial pairing more difficult as the plastic housing on the sensors is not that easy to get open.
Another unexpected issue I ran into was when I tried to remove the old sensors from the previous security system. They were installed using very strong self-adhesive pads and when I was removing them, they did come off, but they took chunks of drywall with them. I now have 3 windows in my house with a big brown spot where the old sensors used to be mounted. The adhesive is very strong and if you aren’t extremely careful you can damage the surface you are applying them to if you ever need to remove them. At least with screws you only end up with a small hole or two, which is better than a large missing patch of drywall and paint.
I still need to add just a few more sensors to cover all of my windows and doors but at this point I have the basic home security system installed and functioning. I tested the sensors to make sure that I had everything setup correctly. I did the pairing one sensor at a time and then placed it where it belonged so that I didn’t get anything mixed up.
Once all the hardware was in place it was time to activate. That’s where SafeMart and alarm.com come in. I worked with a number of people from SafeMart to get my system activated, it was actually surprising to me that so many people were involved in the activation process. First there was “Jared” who took my basic info and payment information for the monitoring plan I selected. Then there was “Michelle” who was in the monitoring department and she walked me through creating my SafeMart customer portal account. She also scheduled a conversation with an installer “Greg” who called me back an hour and a half later to walk me through the actual/technical activation process.
Once I was on the phone with Greg, it was mostly a time of waiting for him to create my alarm.com account and register my cellular module in their system. Another Tip: you will need to reboot the XTi panel after they activate the cellular module, apparently the module registers itself at boot up. The reboot process includes disconnecting the battery, and AC power. We waited 1 minute and then put the battery back in and re-connected AC power. Once done, the cellular module registered successfully and tested out okay.
At this point, my system is in a 72 hour test phase where I can play around with the configuration and test it out thoroughly. I want to make sure that everything is securely installed and functioning properly so that I don’t cause any false alarms once the monitoring exits the test phase. Right now two of my sensors have an “N/A” status at the panel which I’ll need to investigate, but otherwise everything seems to be working well.
Once my alarm.com account was setup and I had completed the basic configuration setup online – it was time to play with the mobile apps for our iPhones. I installed the alarm.com app on two iPhones and created a separate login account for my wife to use so that we could each have separate geo-location triggers. The app itself is a clean modern look with black and orange highlights (on the iPhone). It works well and I am happy with the functionality it provides. I have only two minor gripes about the mobile app for iPhone/iPad.
1. There is branding at the bottom that says “powered by alarm.com”. I would personally prefer if this was part of the header logo rather than what appears more like an AD placed at the bottom of the app. I find it distracting and it reminds me of ad banners that make me want to look for the paid version of the app without the branding.
2. The app works in a “pull” mode, where it’s not necessarily real-time information on your screen. Some of the screens have a refresh button or a swipe down to refresh. Nothing wrong with that, but it would be more economical as a user if the info were refreshed real-time when the app was open. Again nothing serious, just minor critiques.
I’m sure the alarm.com app will continue to improve and the user interface will be refined as time goes on. Just before I cancelled service with my old home security system they had recently released a new version of their mobile app “LifeShield” which has a very nice UI and real time updates. I’m sure alarm.com could do something similar and given time I suspect that their app will also continue to improve. In all fairness it was many years before LifeShield updated its mobile app. (note: I like the iPad version of the app better than the iPhone version).


The last thing I want to talk about is the geo-location feature. This is something that I am geeking out about. Thanks to alarm.com supporting multiple logins for their service, you can run the mobile app on separate mobile devices and each can be independently monitored and used with the ge-location function.
So far I have created two geo-zones, one for home and one for the area where I work during the day. The idea being that I can have the system notify my wife if she leaves the vicinity of our house without arming the system. And when I leave work for the day I can have the system perform other functional automatically for me, such as set the thermostat to my desired comfort level so the house is nice and cool when I get home. These are just a few of the potential options available with this system. Once I get more devices to connect via zwave I will be able to do some really cool stuff like door lock automation, lighting control, etc. But that is what I’ll write about in part 2 of this post.
The only outstanding issue I need to work on so far is that I can’t seem to get the unit to chime properly when a door or window is opened. I’m sure this is another documentation issue. Most likely I need to move the sensors to a different group in order to get the chime. Right now everything is just silent, which isn’t bad, but with kids in the house its nice to hear when a door or window is opened.
To sum up, the system is well made, sophisticated but still very manageable for a do-it-yourselfer like me. Anyone who knows how to use a search engine for questions they have – could install this system. Although it would be nice if the documentation that comes with the system was better. Hopefully the tips I’ve shared here will at least help someone else as they go through this same exercise.
I’ll update this post over the next few weeks as I learn more about the system and any quirks I observe. And keep an eye out for Part 2 of this post where I’ll share my experiences with zwave home automation – coming soon.
Links:
Safe Mart – http://www.safemart.com
Alarm.com – http://www.alarm.com
Interlogix Simon XTi – http://www.interlogix.com/intrusion/brand/simon-xti/
Simon XTi interactive Demo – http://interlogix.com/simonxti_demo/
Gotcha when adding Exchange transport rule disclaimers
Recently I was involved in a project to test outgoing e-mail disclaimers for only a specific group of users in our company. Normally this would be a no-brainer using the standard features in Exchange transport rules to add a disclaimer using specific criteria. However, while testing the disclaimers with a colleague, he observed that his tests worked fine when sent from a mailbox on Exchange 2007, but failed to work at all when coming from a mailbox on Exchange 2010.
So I began troubleshooting this issue and trying to find the cause of the problem. In our company we actually have 3 generations of Microsoft Exchange running in a co-existence scenario (2003, 2007 and 2010 – with 2013 coming soon). I tried everything I could think of to get the transport rule disclaimer to work, testing it on my own mailbox which is hosted on an Exchange 2010 server. Sure enough the disclaimers did not work for my account.
I poured over KB articles and forum posts scouring the internet for any tips that might at least point me in the direction. After several hours of searching I stumbled upon a forum post indicating that I should check the “remote domains” properties in the Exchange shell. So I ran the command “get-remotedomains | FL” and sure enough the “isInternal” value was set to “true”. Given that our transport rule disclaimers were conditional upon being sent to recipients who were “external” to our Exchange organization – of course none of the rules would work.
In order to resolve the issue, I ran the following command: “get-remotedomain | set-remotedomain -isinternal $false”
This allowed Exchange 2010 hub transport servers to recognize all email recipient domains not configured in our Exchange organization as “external”. A second round of testing revealed that this change did in fact resolve the issue and the transport rule disclaimers worked perfectly for everyone, both Exchange 2007 and 2010 mailboxes.
I am amused and slightly annoyed that the vast majority of forum posts and KB articles I found about how to use Exchange transport rules to send outbound disclaimers has no mention of this possible “gotcha”. I’m sure there are limited circumstances that would result in this issue which is probably why it was not mentioned in the articles I was reading, but I offer this as help to those who may face a similar situation.
De-evolving technologically
A lot has happened since I last posted, but I thought it would be good to post a quick update on the changes I’ve made technologically over the last few months.
The first major change is the decommissioning of my personal Exchange mail system. My home server setup was getting far too complex and expensive to maintain so it was decided to do some downsizing and basically get rid of a bunch of servers. At the time I began to remove servers, there was 6 being used full time. It got to a point where I had built a powerful white-box server on which to run VMWare ESXi 5 which allowed me to virtualize all of my servers. There were 2 for AD/DNS/DHCP and 2 for Exchange 2010 in a DAG and 1 for simple/general tasks like backups and game servers.
To be honest, my wife and I got quite accustomed to having enterprise level features in our home e-mail solution. As someone with about 12 years of Exchange experience I had it setup right which included custom domain names, SSL certificate, networking to support ActiveSync for our iPhones, etc. I had wanted to simplify things for quite a while, but never could find just the right solution to handle our e-mail and calendaring in a way that would remain highly functional and not be difficult to migrate to. Then along came a new service by Microsoft called Outlook.com. Long story short, outlook.com is everything we needed to get rid of Exchange and simplify the home setup.
Our email, calendars, contacts, etc – were all easily migrated to Outlook.com. Of course I had to dump about 8GB of archived messages to PST files out of Exchange, but thats a normal part of the process. For the time being, we’re still using Microsoft Outlook to grab old messages, but for all new messaging features we’re going with Windows Live Mail. It integrates nicely with Outlook.com and gives us a very nice user experience with pretty much all of the features that we were accustomed to while using Exchange.
Unfortunately, the networking side of things hasn’t transitioned quite so easily. When we had all of these servers running they were responsible for most of our networking services, like DNS/DHCP. Transitioning to router based network services was a bit of a challenge. I ended up buying an Asus RT-N66U dual band 802.11N Wi-Fi router. The Verizon FIOS router is forwarding all traffic to the Asus router (DMZ). In the Asus router I’m doing all my port forwarding rather than having the Verizon router handle of that. Mainly because the ASUS router won’t allow many of its advanced features if its configured as a mere AP, it must be in router mode for the bells and whistles.
An unfortunate side-effect of this transition is that all of our Apple Devices appear to be rather slow on Wi-Fi using the new home network setup. I’ve run lots of diagnostics and tried many tweaks but nothing I’ve done so far has restored pre-transition device speed for the iDevices. Strangely enough my laptop works fairly well on both the 2.4GHz and 5GHz Wi-Fi Networks. I suspect there is some advanced tweaking that could be done to improve the iDevice performance over Wi-Fi, but so far I haven’t figured it out.
At this point, my office has one nice PC in it, a PC that is quiet and easy to maintain. The big server is now going to go up for sale, hopefully on Craigslist. After adding everything up, it seems I have approximately $1,200 worth of server/parts available for sale. This was a great machine, dual quad core Opteron 2.2GHz CPUs, 32GB DDR2 memory, 6 SATA HDD for over 5 TB of disk space, etc. This machine was perfect for virtualizing servers, the only downside is the noise and heat.
To sum up, I’m no longer running a bunch of servers at home. No more Exchange for home messaging, no more noise, no more extra heat in the office, its all gone. And its interesting how quickly we grew accustomed to the noise in the office and how much we enjoy the quiet now that its gone.
In addition to the servers being removed, I also finally got us off the Ooma VOIP service. Someone purchased the Ooma box from me via craigslist and took it off my hands. Since we’ve bundled phone services with Verizon FIOS there was simply no further need for an additional home phone service.
Outlook.com is handling our messaging needs very nicely. The web interface is easy to use and very clean. It supports Active Sync via the Hotmail connector in the Apple Mail client, which is very nice. The only things we really miss are server based Distribution lists and shared calendars. However, none of that was a deal-breaker for us.
As a result of the downsizing, it looks like we will be saving approximately $600 a year in services and fees from all of the various resources I needed in order to run such a system at home. That includes Microsoft licensing and domain names, SSL, etc. Needless to say this transition is going to be a cost saver with only a few minor networking kinks to work out.
Getting Data Protection Manager agent to work on remote servers
I am now using Microsoft Data Protection Manager 2010 to handle backups of my personal Exchange mail server. It took a while to figure out how to set this up since I had never used this product before and knew nothing about it until talking to my instructor at a recent Exchange 2010 training class I attended. I learned a few tricks that may help someone else quickly avoid problems during a deployment of DPM 2010.
First, DPM server must be a standalone server, it cannot be installed on an Exchange server or a domain controller. In addition, you should install the AD management tools on the server as without them you will get a cryptic error message telling you that the server cannot communicate with AD and thinks you are in a workgroup or have a mis-configured DNS client.
Now that you have the DPM Server installed, its time to deploy the agent. You can deploy the agent to remove computers from a wizard driven interface, however I found that this did NOT work for me at all. I had to manually install the agent by running the agent installer directly from the C:Program FilesMicrosoft Data Protection ManagerDPMProtectionAgents. Think you are done…not quite! Now open a command prompt and navigate to the DPMbin directory. Execute this command “setdpmserver -dpmservername nameofyourserverhere” and press enter. for the servername, use the FQDN (i.e. servername.domain.local). The documentation says to use domainservername, but this DOES NOT WORK.
One you do the above, you can go into the services control panel and set the DPM server service to automatic and start it. Now you can go to your DPM server and configure protection groups and add member servers. Enjoy!
My first AD domain rename
I recently had the pleasure of getting to perform my very first Active Directory domain rename. This situation was the result of some bad planning on my part a few years ago when I first setup Active Directory in my home office, but I’ll talk about that in a separate thread that deals with Exchange 2010.
To do the rename, I was expecting to see the “Rename domain” option in ADUC, but as it turns out its all command line. So after a few commands of the rendom tool, I was able to rename my AD domain. I first had to remove Exchange completely, then I was able to perform the rename. It wasn’t that bad and went rather well. I did run into a few bumps, such as my DNS server needing a manual re-config, and the connected client machines (desktop and laptop) did not automatically update their DNS suffix.
I wouldn’t recommend doing this unless absolutely necessary, and I very nearly did just start over from scratch, but I wanted to press on and see if I could get everything to work on a renamed domain. To my delight, it worked and I’ve even got Exchange 2010 running now. The only thing I would recommend is to re-install Exchange on a server with a different node name than what it had previously. This caused me all sorts of little issues that I’ll deal with later in a separate post.

Migrating to Windows 7
Yesterday, I upgraded my work PC to Windows 7 professional. I wanted to give the upgrade a try and see how it would go, but normally I prefer to do clean installs. The upgrade process took about 2-3 hours but did retain all my applications and most settings. I did have to remove some HP software that came with the PC, but overall it wasn’t too bad. I had some additional trouble with Ultramon that caused some errors and weird behavior with the taskbar. Here are some observations so far:
1. The taskbar is taller and takes up more screen real estate. This isn’t necessarily bad, but takes some getting used to. It makes the icons look smaller.
2. The quick launch bar has been transformed into something different, mabye better, not sure yet. I was dismayed to find out that the upgrade had wiped out my quick launch folder completely, all my pre-arranged shortcuts were just gone! I found a way to work around this by creating a new quick launch folder manually and moving shortcuts that I wanted in the list. I wish I had backed up my quick launch folder before the upgrade!
3. The transparency is nice, but at times a little weird. Since the top inch or so of many apps is now transparent, it seems like your apps are not maximized or as if there is a big gap at the top of the screen.
4. I think its cute how the new network connection icon in the task bar looks like it has a pitch fork in it. 🙂
5. I like the new start menu, specifically the ability to expand options for programs such as RDP. Now when you go to RDP in the start menu, it gives you an expandable list of recent connections, which I think is nice, even though I use mRemote to organize my RDP connections.
6. Performance seems good, the PC boots up pretty fast especially considering it was an upgrade install.
The official upgrades for my home computers will be available in a few weeks, so I’ll post back later on with more observations.
Switching from Windows Mobile to the iPhone 3GS
Last week I upgraded my cell phone from an HTC Tilt running Windows mobile 6.1 (custom cooked Rom) to the 32GB iPhone 3GS. I wen to the at&t store on Dale Mabry and Henderson and was surprised at how nice of a store it was. I had no lines and no waiting and was able to get in and out with my upgrade in about 10 minutes.
So now that I’ve had my new iPhone for a week now, here are some thoughts and notes about my switch…
Things I miss from Windows Mobile:
1. The ability to control the volume for PDA sounds and the ringer separately. At night I used to mute the PDA sounds and leave the phone ringer on maybe 2 bars. This worked out great for me as I’m on call 24/7, so witching my phone to silent or even putting it on vibrate is not a great option for me. Maybe one day this will be available as a feature on the iPhone.
2. Easier file management. I miss being able to just connect my phone to my PC and copy files back and forth via windows explorer. Having to use iTunes to simply put files on my phone is a bit of a pain, epsecially when I’m not around my home computer and want to copy something to my iPhone. I know there are 3rd party apps out there to help with this, but the lack of built in file management is a bit of a pain. Not to mention that much more limited range of file types you can actually use on the iPhone.
What I love about the iPhone:
1. The interface! Its easy to use, visually appealing, clean and responsive. Windows Mobile can be a bit slow at times and more complicated to navigate through screens and various settings.
2. It just works, right out of the box I was able to connect it to my bluetooth radio in my car for hands free calling. I didn’t have to run through any setup wizard to align my screen or anything like that. It just worked.
3. Easier to get apps! There are many apps for windows mobile, but you have to go hunting for them, and most of the good ones cost money! The iTunes app store has many apps available and a good number of them are free, some good ones too! I love being able to tap “install” and it just goes to work and then you can open the app and begin using it.
Some problems with the iPhone:
1. The mail client lacks the enterprise grade functionality and reliability that I’ve come to get used to with Windows Mobile. I’ve tried different types of mail accounts (activesync and MAPI, etc), and I’ve seen inconsistent behavior with the push functionality. For example, I have an Exchange account setup and sometimes I’ll notice an hour delay in getting notified of new mail. I can be on either 3G or wifi and it still happens. Its just not as reliable for instant e-mail notifications.
2. I really really wish I could control PDA sound volume (email alerts, notifications, etc) separately from the phone ringer. This is huge for me!
Overall, I love my new iPhone. Its awesome to have my mobile phone and my iPod all in one device. It works great with other technologies I employ in my daily life. Some people get a little uptight about losing some enterprise business features or reliability on the iPhone, but thats not really the target audience anyway. And really, most post people are not going to care if they can’t edit Microsoft Office documents on their iPhone, they just want to be able to read and reply to e-mails on the go and are completely happy to do the PC work on the PC and just enjoy the iPhone for what it is.
Have to click user icon to unlock Windows Vista
Something happened to my Windows Vista desktop that I use primarily at work. To explain the issue, here is some background information. I normally lock my computer anytime I step away from it to prevent un-authorized access. It used to be that I could just hit CTRL+ALT+DEL and type in my password and press (Return|Enter) to unlock my machine. However, in the last week or so instead of bringing up the password field for the logged on user when you hit CTR+ALT+DEL, what you get instead is an icon for the username which you then have to click or just hit enter before you type in the password. Now this may not sound like much of a problem, but when you are used to something happening a certain way, changing that makes a difference. I didn’t change any of my user options in Vista, so I am guessing that this is a change from a recent update or something from Microsoft. I don’t have access to many Vista machine to test this on, but I am curious if anyone else has seen this before and if you know how to fix it. If I find a solution I will post it here, but for now I am still looking. I just want to hit CTRL+ALT+DEL and type in my password to logon, I don’t want to have to click on my user icon or have an extra key press before I can put in my password. Maybe thats just me being set in my ways…
Add recipients of sent items to the Outlook auto fill cache
This is a great utility (also free) that will allow you to add the recipients of your sent items to the Outlook auto fill cache. This is great if you reload a PC or in any number of other solutions. Click here to read more about it and download this great utility.
