Category Archives: Projects
Home security – installing a new system with alarm.com (Part 1)
Back in 2007 I wanted to get a home security system that was more than just the standard type of system. I stumbled upon a do it yourself system from a company who at the time was called InGrid, later renamed to LifeShield. It had everything I wanted – keyfobs, mobile app for my phone, nice web interface, modular and redundant, etc. I had that system until yesterday (July 10th, 2013).
I wasn’t actively looking to replace my home security system, but after talking with a friend who happens to work for alarm.com, I was convinced that it was time for an upgrade. Several of the components on the old system were starting to wear out and fail and I was growing tired of clearing problems at the panel.
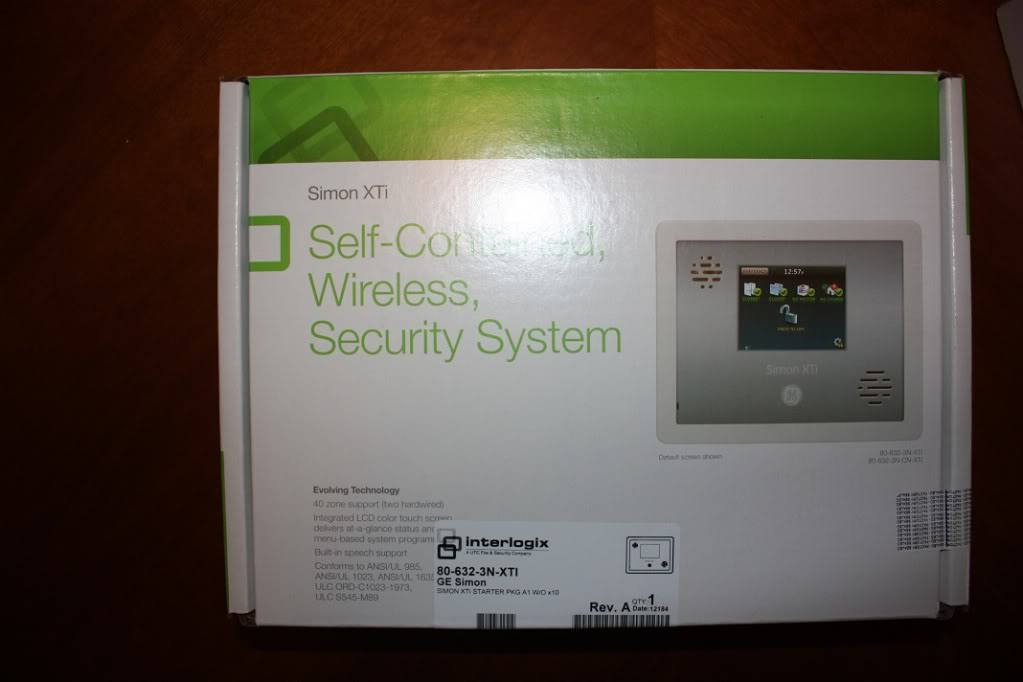
Hello GE Simon XTi by Interlogix and powered by alarm.com through SafeMart!

When I received the GE Simon XTi system it came with 3 door/window sensors (the large model), one keyfob, one motion sensor and one CDMA cellular module. This wasn’t enough to cover all the entry points into my home, so I ordered a few more components through eBay. I also decided to pull out the CDMA cellular module since quite honestly CDMA has terrible coverage in my particular area. What I ended up getting is a GSM cellular module with service through at&t which does have excellent coverage especially since I live less than half a mile from one of their towers.
Most of the parts arrived yesterday and once I was home from work – I began the install and setup process. This blog post will cover the setup and installation of the basic home security system and its components. The second part which I will post later on – will cover my experience setting up zwave devices for home automation and control.
So let’s get to it, first off – the GE Simon system came in a very nicely designed box with all the components packed neatly and safely inside. Packaging sometimes gets overlooked but it’s actually very important for a number of reasons such as safety, marketing, protection from damage during shipping, etc.
The next step was to unbox everything and begin setting up the control panel and connecting the wireless sensors to the system.
Before I could do that I had to set up the panel and get it ready to power on. This entails installing the battery pack, which is simple and nothing special. The system does not come with a standard power cord, you have an AC power pack which you then manually connect the power cable to the leads on the AC pack, then manually connect the other end of the power cable to the leads on the back of the panel. Since its AC power there is no polarity so it doesn’t matter which wire goes where on the panel. Each input connection is labeled “AC Input”.
I also installed the cellular module into the optional bay on the back of the Simon XTi. It simply snaps into place and you can secure it with a screw which is provided in the box. It comes with an onboard antenna but you also get an external antenna extension. I want the best possible signal on my system so I installed the external antenna wire. You just snap it onto the antenna connector located on the cellular module and run it out of the open slots on the back of the panel casing. While doing that I also connected my phone line (although not necessary at all). I noticed the panel also has an ethernet port, but I didn’t bother with that either.

Each standard sensor comes in a white box labeled with the GE part numbers and other information. I wanted to approach this install as someone who had no idea what to do or how to proceed. I was somewhat disappointed that the instructions for each sensor did not mention anything about the specifics of adding the sensor to the XTi panel.

You get a little bit of instruction on how to put the system into learning mode but that’s about it. It would be nice if the manufacturer included information about the sensor, such as which sensor group to add it to, product codes, etc. I was genuinely confused at first when adding sensors since the XTi panel asks you for an optional product code, which you cannot find anywhere on the sensor or its documentation.
A bit of advice: be ready to add sensors and remove them only to re-add later. When setting up my system I actually worked on it over the course of two days and I wasn’t ready for activation right away. I had time to tinker with the sensors and ended up removing and re-adding them perhaps 3 times before I was finally satisfied with the configuration. Part of what I didn’t realize at first is that you can edit the sensor name on the panel when you add each sensor, and also add extra descriptions that get appended to the main description. The default for many of the sensors is “Front Door”. Obviously you should change that to something more descriptive.
The keyfobs for example, were the easiest to program into the system because you simply hold the arm/disarm buttons down at the same time to pair it with the panel, but I had 3 of them and had to do a little internet research to find out what group I should put them in and how to name them so I could show who armed/disarmed the system (since 3 different people will now have a keyfob).
What I did was to pair each Keyfob and let the primary description be “keyfob”. Under that I added another description line with just one letter, the first initial of each person’s name who would own one of these keyfobs. So mine for Example was named “keyfob” then under that, the letter “J”. From there you can login to the Alarm.com web interface and rename the sensor with a more usable or familiar name for the person who will use it. These friendly names are what you see in alerts on the website and on the mobile app as well as in email notifications. It would be nice if the panel let you type in your own description, but instead you have to select from a predefined list of labels.
One minor gripe about the keyfobs. On the old system the keyfobs had a separate button for arming in stay or away modes, but the new keyfobs with the GE system have one arm button and the number of times you press the arm button determines how the system is armed. This will take some getting used to and seems less than ideal to me. But with limited space on the keyfob I can understand this design. One press to arm in stay mode, two consecutive presses to arm in away mode.

Next I installed the motion sensor and smoke detector. These were very straightforward and also easy to program. I did have a few minutes of confusion over the smoke detector however, after I paired it with the panel I started getting error messages complaining about the serial number already existing. It turned out that the system was still in learn mode after I had paired the sensor with the panel, but I was still tinkering with the smoke detector which triggered the pairing process again.
Another Tip: when pairing the smoke detector, close out of the learning mode on the panel so that you don’t end up getting confused and troubleshooting a problem that doesn’t exist. I also had to determine the proper group for adding the smoke detector. I don’t recall seeing any documentation with the system that gives you a table of which groups are for which types of sensor. I had to find this information on a YouTube video that SafeMart provided. It would be nice if this information were either included with the system or included on the documentation that comes with each sensor.
My only gripe about the motion sensor is that it is not labeled up or down to help you determine which way to mount it. I have not yet invested the time to research this yet, so it’s very possible that I have mine incorrectly mounted.
I am using 3 of the larger crystal door sensors, but I also ordered and received several of the micro door/window sensors. I highly recommend the micro sensors over the larger ones. The smaller sensors comes with self-adhesive pads making them easier to install in some spots, but the larger sensors do not come with any adhesive pads at all, and seem to be intended for screw mounts. I had to get creative in how I mounted several of my sensors. A minor gripe about the door/window sensors, both have to be pried open to pair them with the panel. This is something I needed a small screw driver for, it’s just a one time thing and not a big deal, but it does make initial pairing more difficult as the plastic housing on the sensors is not that easy to get open.
Another unexpected issue I ran into was when I tried to remove the old sensors from the previous security system. They were installed using very strong self-adhesive pads and when I was removing them, they did come off, but they took chunks of drywall with them. I now have 3 windows in my house with a big brown spot where the old sensors used to be mounted. The adhesive is very strong and if you aren’t extremely careful you can damage the surface you are applying them to if you ever need to remove them. At least with screws you only end up with a small hole or two, which is better than a large missing patch of drywall and paint.
I still need to add just a few more sensors to cover all of my windows and doors but at this point I have the basic home security system installed and functioning. I tested the sensors to make sure that I had everything setup correctly. I did the pairing one sensor at a time and then placed it where it belonged so that I didn’t get anything mixed up.
Once all the hardware was in place it was time to activate. That’s where SafeMart and alarm.com come in. I worked with a number of people from SafeMart to get my system activated, it was actually surprising to me that so many people were involved in the activation process. First there was “Jared” who took my basic info and payment information for the monitoring plan I selected. Then there was “Michelle” who was in the monitoring department and she walked me through creating my SafeMart customer portal account. She also scheduled a conversation with an installer “Greg” who called me back an hour and a half later to walk me through the actual/technical activation process.
Once I was on the phone with Greg, it was mostly a time of waiting for him to create my alarm.com account and register my cellular module in their system. Another Tip: you will need to reboot the XTi panel after they activate the cellular module, apparently the module registers itself at boot up. The reboot process includes disconnecting the battery, and AC power. We waited 1 minute and then put the battery back in and re-connected AC power. Once done, the cellular module registered successfully and tested out okay.
At this point, my system is in a 72 hour test phase where I can play around with the configuration and test it out thoroughly. I want to make sure that everything is securely installed and functioning properly so that I don’t cause any false alarms once the monitoring exits the test phase. Right now two of my sensors have an “N/A” status at the panel which I’ll need to investigate, but otherwise everything seems to be working well.
Once my alarm.com account was setup and I had completed the basic configuration setup online – it was time to play with the mobile apps for our iPhones. I installed the alarm.com app on two iPhones and created a separate login account for my wife to use so that we could each have separate geo-location triggers. The app itself is a clean modern look with black and orange highlights (on the iPhone). It works well and I am happy with the functionality it provides. I have only two minor gripes about the mobile app for iPhone/iPad.
1. There is branding at the bottom that says “powered by alarm.com”. I would personally prefer if this was part of the header logo rather than what appears more like an AD placed at the bottom of the app. I find it distracting and it reminds me of ad banners that make me want to look for the paid version of the app without the branding.
2. The app works in a “pull” mode, where it’s not necessarily real-time information on your screen. Some of the screens have a refresh button or a swipe down to refresh. Nothing wrong with that, but it would be more economical as a user if the info were refreshed real-time when the app was open. Again nothing serious, just minor critiques.
I’m sure the alarm.com app will continue to improve and the user interface will be refined as time goes on. Just before I cancelled service with my old home security system they had recently released a new version of their mobile app “LifeShield” which has a very nice UI and real time updates. I’m sure alarm.com could do something similar and given time I suspect that their app will also continue to improve. In all fairness it was many years before LifeShield updated its mobile app. (note: I like the iPad version of the app better than the iPhone version).


The last thing I want to talk about is the geo-location feature. This is something that I am geeking out about. Thanks to alarm.com supporting multiple logins for their service, you can run the mobile app on separate mobile devices and each can be independently monitored and used with the ge-location function.
So far I have created two geo-zones, one for home and one for the area where I work during the day. The idea being that I can have the system notify my wife if she leaves the vicinity of our house without arming the system. And when I leave work for the day I can have the system perform other functional automatically for me, such as set the thermostat to my desired comfort level so the house is nice and cool when I get home. These are just a few of the potential options available with this system. Once I get more devices to connect via zwave I will be able to do some really cool stuff like door lock automation, lighting control, etc. But that is what I’ll write about in part 2 of this post.
The only outstanding issue I need to work on so far is that I can’t seem to get the unit to chime properly when a door or window is opened. I’m sure this is another documentation issue. Most likely I need to move the sensors to a different group in order to get the chime. Right now everything is just silent, which isn’t bad, but with kids in the house its nice to hear when a door or window is opened.
To sum up, the system is well made, sophisticated but still very manageable for a do-it-yourselfer like me. Anyone who knows how to use a search engine for questions they have – could install this system. Although it would be nice if the documentation that comes with the system was better. Hopefully the tips I’ve shared here will at least help someone else as they go through this same exercise.
I’ll update this post over the next few weeks as I learn more about the system and any quirks I observe. And keep an eye out for Part 2 of this post where I’ll share my experiences with zwave home automation – coming soon.
Links:
Safe Mart – http://www.safemart.com
Alarm.com – http://www.alarm.com
Interlogix Simon XTi – http://www.interlogix.com/intrusion/brand/simon-xti/
Simon XTi interactive Demo – http://interlogix.com/simonxti_demo/
WABC project meeting
I met yesterday afternoon around 2pm with Michael Odell about the WABC website. We went over the details of the site, and how its setup, where to go for what, and gave them all the info I had. I sent Michael the e-mail I composed for him with all the links and information needed to manage the site.
His mom came with him and seemed very nice. Michael seemed a little timid but he got on the computer and I had him go through adding a calendar entry and looking things over. They both sounded like this should be pretty easy and then they left just after 2:30. So it wasn’t a long meeting, but hopefully was informative.
Once we get more information from Gary and Lynn regarding actual content for the site, we can get it up and running and finish our part for now.
